Using Ngrok to Debug Azure B2C Custom Policy REST API Endpoint
Streamline Azure B2C custom policies with Ngrok for local testing. Set up Ngrok, create a static subdomain, and tunnel your ASP.NET application for seamless debugging and development.

Currently, I am working on Azure B2C custom policies. These have a wide range of configuration options, all in XML. Naturally, errors do creep in, especially when combining derived policies and the corresponding XML files that have been uploaded. Sometimes, you call your REST API to extend claims or trigger other functionalities. This can be time-consuming, especially if you need to publish the API and debug remotely or read the logs.
I have decided to work with Ngrok during the development phase and test my services locally within the framework of Azure B2C custom policies. The steps to achieve this are straightforward.
- Create an account on ngrok.com
- Install the macOS agent
- Configure a static Subdomain
- Open up a tunnel for your ASP.NET application
- Debug the Azure B2C Custom Policy
Account on ngrok.com
You need an account to use the free tier of ngrok.com. The free tier is absolutely enough if you only want to expose your services during development. You can use
ephemeral domains as endpoints, or you can claim a free static domain. So, one static subdomain is free, and it is a perfect fit, as restarting ngrok will allow you to specify this domain each time. Hence, developing custom policy files for Azure B2C can include the custom subdomain as an endpoint.
Install the macOS agent
You can install ngrok from the website or install ngrok via Homebrew with the
following command if you are on macOS.
brew install ngrok/ngrok/ngrokRun the following command to add your auth token to the default ngrok.yml
configuration file.
ngrok config add-authtoken 8zp...puztO
he key is scrambled for reasons. To get your key, look up your account
registration.
Configure Static Subdomain
Go to the ngrok website, and in Domains you can register on the free plan
exactly one domain, like in this screenshot

Note down the generated subdomain name and use it from now on to tunnel your
apps
Tunnel ASP.NET Core Web API
I showcase creating the tunnel using an Azure B2C project to test REST API calls
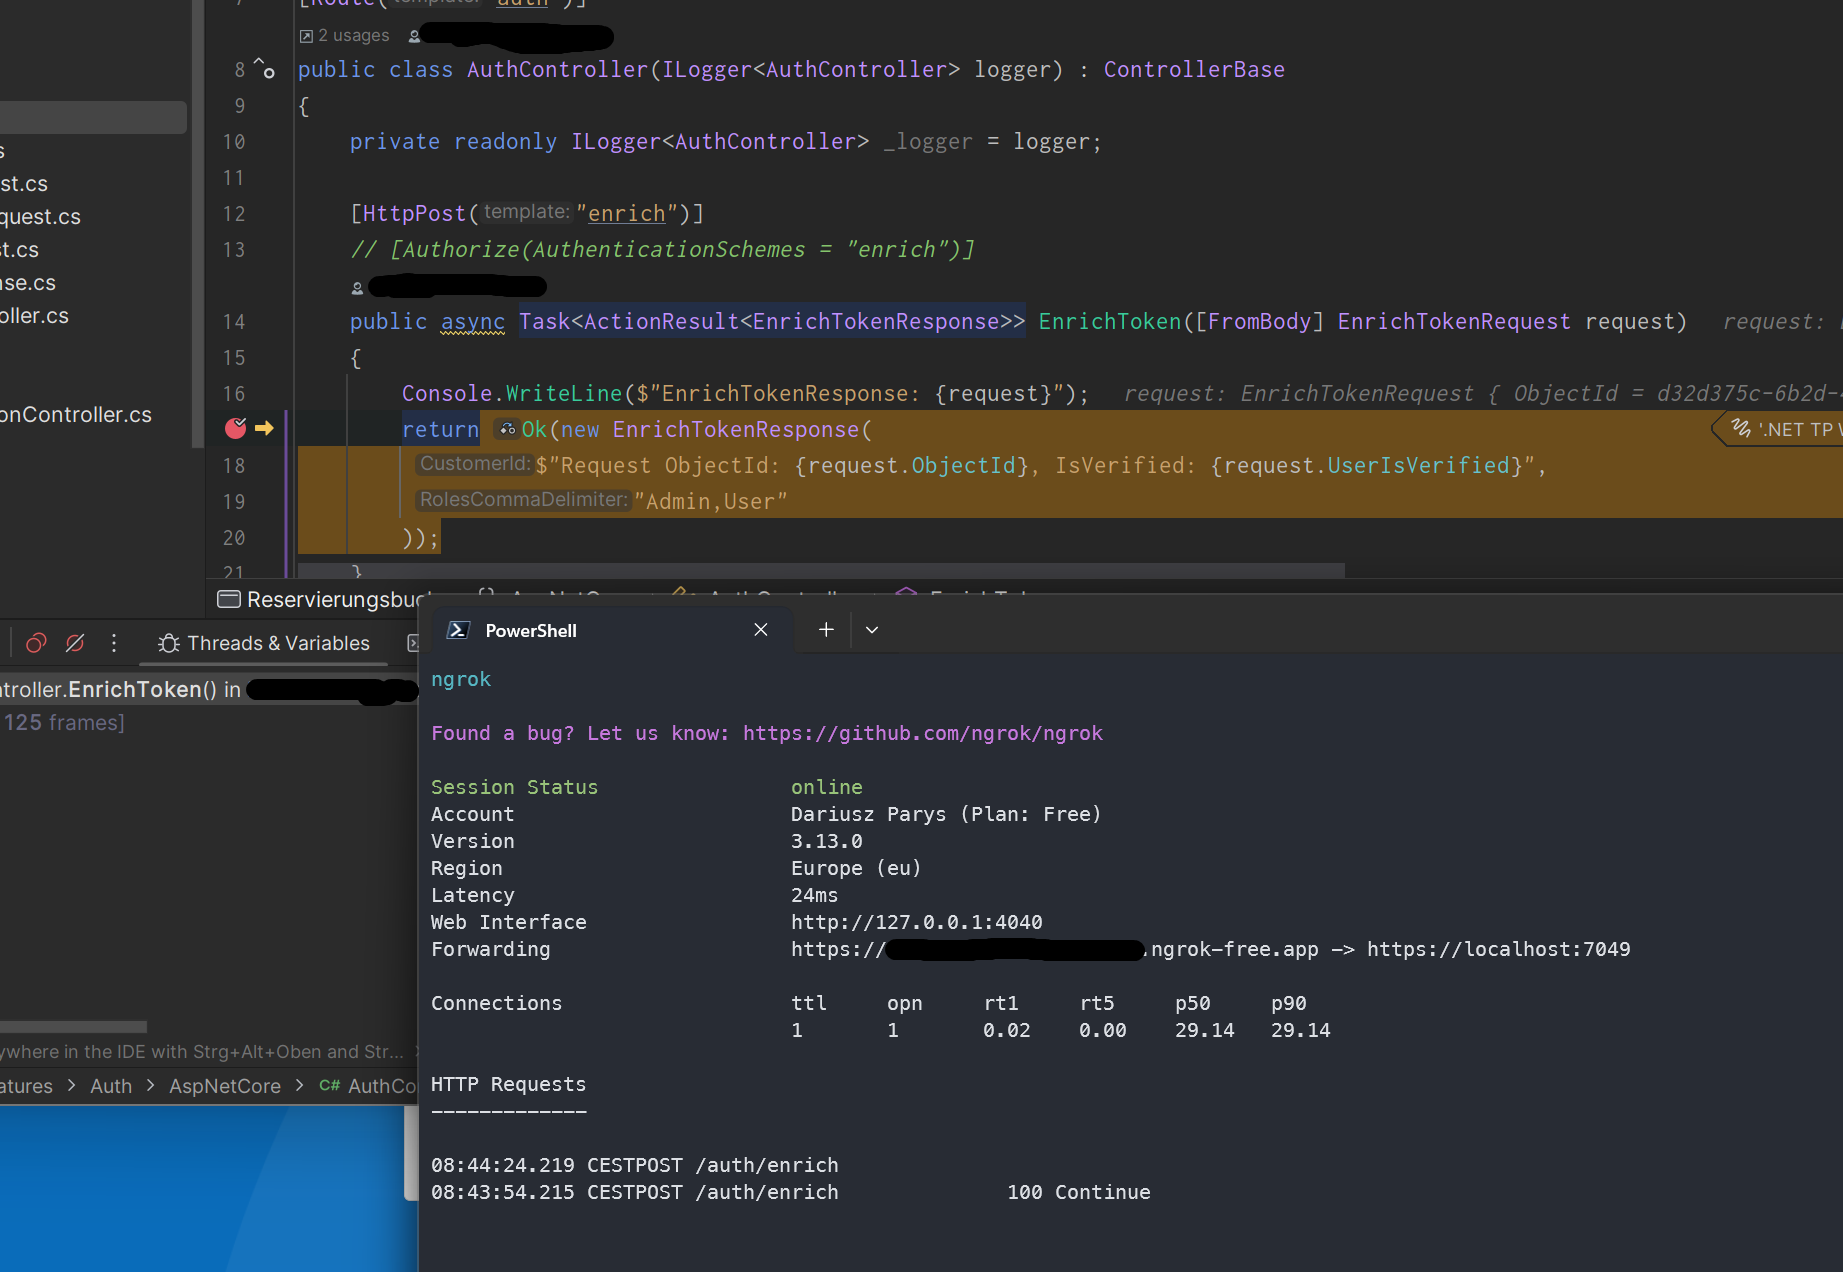
from Azure B2C custom policies. Starting the Web API project runs the https traffic through https://localhost:7049. To make this now publicly available, we can simply run the following ngrok command now from the terminal
ngrok http --domain=your-custom-subdomain.ngrok-free.app https://localhost:7049
and the tunnel starts and can be investigated from now on

Debugging Azure B2C Custom Policy
Now we can debug the custom policy on the local machine. Therefore, we need to
exchange the value ##enrichttokenurl## with the actual forwarding URL from ngrok, which is, in this case, the your-custom-subdomain.ngrok-free.app/auth/enrich
Here is how the ClaimsProvider looks. It is stored in one of the XML configuration files for the custom policies.
<ClaimsProvider>
  <DisplayName>REST APIs</DisplayName>
  <TechnicalProfiles>
    <TechnicalProfile Id="REST-GetProfile">
      <DisplayName>Get user extended profile from Web Api</DisplayName>
      <Protocol Name="Proprietary"
        Handler="Web.TPEngine.Providers.RestfulProvider, Web.TPEngine, Version=1.0.0.0, Culture=neutral, PublicKeyToken=null" />
      <Metadata>
        <Item Key="ServiceUrl">##enrichtokenurl##</Item>
        <Item Key="AuthenticationType">None</Item>
        <Item Key="SendClaimsIn">Body</Item>
        <Item Key="AllowInsecureAuthInProduction">true</Item>
      </Metadata>
      <InputClaimsTransformations>
        <InputClaimsTransformation ReferenceId="CopyToUserIsVerified" />
      </InputClaimsTransformations>
      <InputClaims>
        <InputClaim ClaimTypeReferenceId="objectid" />
        <InputClaim
          ClaimTypeReferenceId="userIsVerified" />
      </InputClaims>
      <OutputClaims>
        <OutputClaim ClaimTypeReferenceId="customerId" />
        <OutputClaim ClaimTypeReferenceId="roles" />
        <OutputClaim ClaimTypeReferenceId="rolesCommaDelimiter" />
      </OutputClaims>
      <OutputClaimsTransformations>
        <OutputClaimsTransformation ReferenceId="ConvertRolesToStringCollection" />
      </OutputClaimsTransformations>
      <UseTechnicalProfileForSessionManagement ReferenceId="SM-Noop" />
    </TechnicalProfile>
  </TechnicalProfiles>
</ClaimsProvider>
Ignore for a moment the claims transformations and custom properties. We need to update the metadata section with the item key ServiceUrl
Once that is done, we are ready to debug and hit our breakpoint. For demonstration purposes the handler is just hardcoding return values.
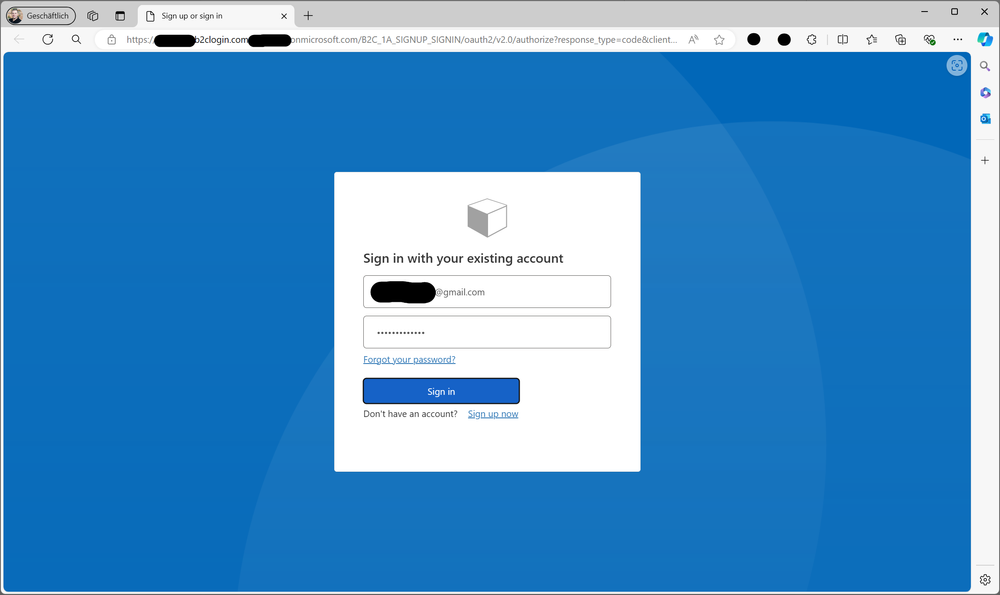
After logging in into Azure B2C using Postman, we specify our local account

and hit now the breakpoint of our API endpoint that is used in the Azure B2C
custom policy on our local machine

With this enabled, it is much easier to work with Azure B2C REST API endpoints
referenced by your custom policies. You can debug and examine what claims are
really entering the API endpoint. This is much faster than deploying the service
each time and remotely debugging through machine boundaries or analyzing logs.
Cheat Sheet
| URL | Protocol | Command |
|---|---|---|
| Ephemeral | http | ngrok http 5162 |
| Ephemeral | https | ngrok http https://localhost:7049 |
| Custom Domain | http | ngrok http --domain=your-custom-subdomain.ngrok-free.app 80 |
| Custom Domain | Https | ngrok http --domain=your-custom-subdomain.ngrok-free.app https://localhost:7049 |
